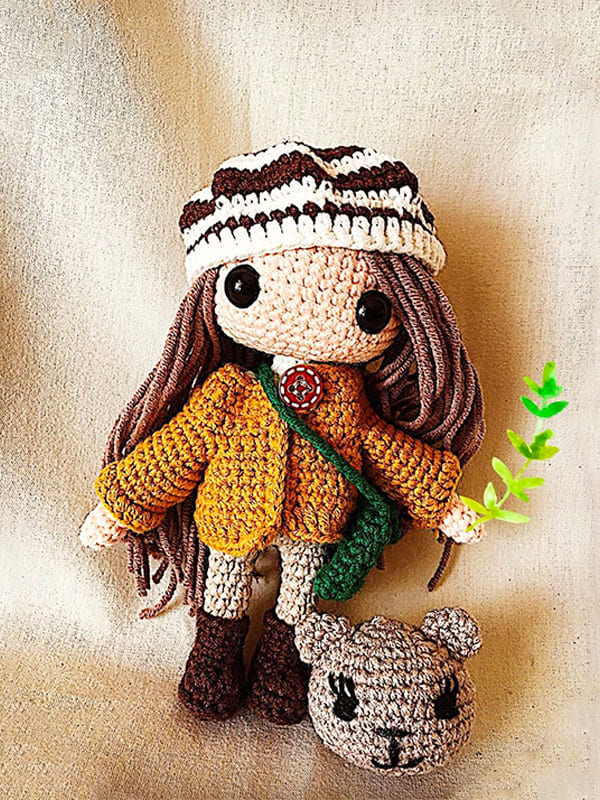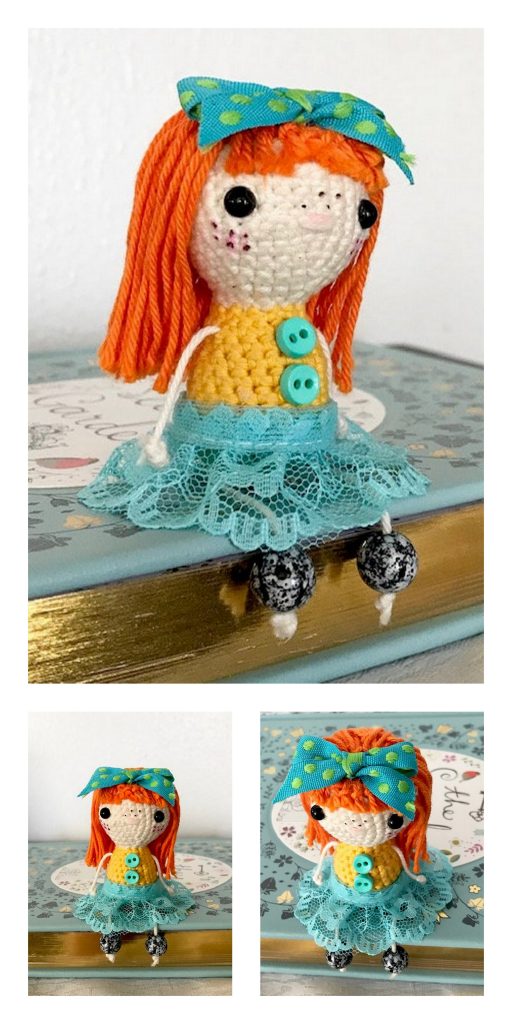
Amigurumi White Cute Doll Free Crochet Pattern
Hello my visitors who love to knit amigurumi. In this article, I share new amigurumi patterns for you free of charge. To knit free amigurumi patterns, it will be enough to follow the terms I shared for you. You can delight your children with amigurumi toys.
Materials:
Can be knitted from any yarn
I have – the main one –
Himalaya “Dolphin Baby” (% 100 Micro Polyester, 90 m / 100 g)
and Katia “Velvet Fine” (100% polyester, 160 m / 50 g)
Eyes 10 and 12mm.
Wire optional (pink Zaya on the frame).
Extra yarn for spout and trim –
– Gazzal “Baby Cotton” (60% cotton, 40% polyacrylic, 165 m / 50g)
– and Katia “Velvet Fine” is a different color.
Abbreviations:
AR – Amigurumi Magic ring
MR – Amigurumi Magic ring
App – application
ll – lift loop
sc : Single Crochet
inc : Increase
dec : Decrease
tr : Triple Crochet/ Treble Crochet
st: Stitch
dc : Double Crochet
hdc: Half Double Crochet
sl-st : Slip Stitch
ch : Chain
..in : make increase into same stitch as many as the number which is given in front of “inc” abbreviation (exp; 3inc, 4inc..).
FLO : Crochet into front loops only
BLO : Crochet into back loops only
BL : Bobble Stitch – do 5dc all in the same stitch and then yarn over and pull through all the loops on your hook (the original loop + 1 loop for each partially completed dc).
We knit in a spiral, use a marker. The head, ears and legs are dangling.
Lower legs.
the main thread, the marker runs in the middle, back.
1. 6sc in MR (6)
2. (inc)*6. (12)
3. (1sc,inc)*6. (18)
4. 5sc, (fluffy column (additional thread – 3dc in one column,), main thread – sc in the next column) * 4, 5sc
Lush column with one crochet
We knit 3 columns with one crochet without completing the last stage, grab the working thread and knit all the loops together.
5. 5sc, (dec)*4, 5sc. (14)
6. 14sc. (14)
7. 4sc, (inc)*6, 4sc. (20)
8. 4sc, (1sc, inc)*6, 4sc. (26)
9 – 11. Three rows 26sc. (26)
12. 5sc, (inc, 3sc)*4, inc, 4sc. (31)
On the left foot – do not tie the last 4 columns, cut the thread, fasten.
On the right – knit 3sc, do not cut the thread.
We apply the left one to the pea and knit with a separate thread together 5sc, cut the thread, fasten it, fill it.
I inserted a button into the sole of the foot.
We continue to knit the little body, the marker goes down the middle of the back.
Fill in as you knit.
1. put a marker, 3sc, (inc,1sc)*3, inc, 9sc, (inc, 2sc)*2, inc – on the left foot, inc, (2sc,inc)*2, 9sc, inc, (1sc,inc)*3, inc, 3sc – on the right(66)
2. 66sc. (66)
3. 3sc, (inc, 2sc)*3, 42sc, (2sc,inc)*3, 3sc. (72)
4 – 8 five rows 72sc. (72)
9. 5sc,dec,(10sc,dec)*5,5sc. (66)
10. 66sc. (66)
11. (9sc,dec)*6. (60)
12. 4sc,dec,(8sc,dec)*5,4sc. (54)
13. 54sc. (54)
14. (7sc, dec)*6. (48)
15. 48sc. (48)
16. 3sc,dec,(6sc, dec)*5,3sc. (42)
17. 42sc. (42)
18. (5sc, dec)*6. (36)
19. 36sc. (36)
20. 2sc,dec,(4sc,dec)*5,2sc. (30)
21. 30sc. (30)
22. (3sc,dec)*6. (24)
23. 24sc. (24)
24. (dec,2sc, )*6. (18)
25 – 32. Восемь рядов 18sc. (18)
We knit holes for the upper legs,
33.3sc, 3ch, skip 3 columns, 6sc, 3ch, skip 3 columns, 3sc.
34.3sc, 3sc on ch, 6sc, 3sc on ch, 3sc. (18)
35 – 37 three rows 18sc. (18)
Cut the thread, fix it.
Front legs.
The main thread, you can not follow the marker, do not fill.
1. Attach the thread to the first, from the skipped, column 3sc, 1sc between rows, 3sc along ch, 1sc between rows. (8)
2 – 21. Twenty rows of 8sc. (20)
22. inc, 3sc, inc, 3sc. (10)
23. inc, 4sc, inc, 4sc. (12)
24. 2sc, inc, 5sc, inc, 3sc. (14)
We knit the, palm, paws with a heart, make sure that the middle of the, palms, on both paws is the same.
Divide in half
We skip 6 columns, in the seventh –
a. inc, 5sc, inc. (9)
b. 9sc. (9)
c. (dec) * 4.1sc. Cut, tighten, secure and hide the thread.
We attach the thread to the separation column and knit a, b, c.
Spout. The pink nose and the body are made of katya, the hook is smaller.
We start with a finishing thread for the spout.
1. 6sc in MR (6)
2. (inc)*6. (12)
3. (1sc, inc)*6. (18)
4. 18sc. (18)
5. 18sc. (18)
6. (1sc,dec)*6. (12) next row with main thread.
Extra yarn spout.
1. 6sc in MR. (6)
2. (inc)*6. (12)
3 – 4. Two rows 12sc. (12)
5. (dec)*6. (6)
6. Change color (inc)*6. (12)
Continuing the head, the marker goes along the chin and in the middle of the back of the head.
1. (1sc, inc)*6. (18)
2. 3sc, (inc)*3, 6sc, (inc)*3, 3sc. (24)
3. (3sc, inc)*6. (30)
4. 6sc, (inc)*3, 12sc, (inc)*3, 6sc. (36)
5. (5sc,inc)*6. (42)
6. 9sc, (inc)*3, 18sc, (inc)*3, 9sc. (48)
7. (7sc,inc)*6. (54)
8. (8sc,inc)*6. (60)
9. (9sc,inc)*6. (66)
10. (10sc,inc)*6. (72)
11. (11sc,inc)*6. (78)
12. (12sc,inc)*6. (84)
13. 37sc, (inc, 2sc)*3, inc, 37sc. (88)
14. 88sc. (88)
15. 3sc, (dec, 2sc)*5, dec, 12sc, (inc, 2sc)*4, inc, 12sc, (dec, 2sc)*5,dec, 4sc. (81)
16. dec, 79sc. (80)
17 – 18 two rows 80sc. (80)
19. (2sc,dec)*4, 48sc, (dec, 2sc)*4. (72)
Neck opening.
20. 70sc, 2ch, 2 skip the column.(70)
21. 2ch, 2 skip the column, 68sc, 2sc under ch. (68)
22. 2sc under ch, 70sc. (72)
23. 72sc. (72)
24. (10sc, dec)*6. (66)
Ear Holes
25. 29sc, 3ch, 3 skip the column, 3sc, 3ch, 3 skip the column, 28sc. (60)
26. 29sc, 3sc in ch, 3sc, 3sc in ch, 28sc. (66)
27. (9sc, dec)*6. (60)
28. 4sc, dec, (8sc, dec)*5, 4sc. (54)
29. (7sc, dec)*6. (48)
30. 3sc, dec, (6sc, dec)*5, 3sc. (42)
31. (5sc,dec)*6. (36)
32. 2sc, dec, (4sc, dec)*5, 2sc. (30)
33. (3sc, dec)*6. (24) fill.
We tie the last rows after all the ties:
34. (2sc, dec)*6. (18)
35. (1sc, dec)*6. (12)
36. (dec)*6. (6) cut, tighten, secure and hide the thread.
Ears are the main thread, you can not follow the marker, do not fill.
We attach the thread to the first of the skipped loops,
1 – 5. Five rows6sc. (6)
6. inc, 2sc, inc, 2sc. (8)
7 – 9. Three rows 8sc. (8)
10. inc, 3sc, inc, 3sc. (10)
11 – 13. Three rows 10sc. (10)
14. inc, 4sc, inc, 4sc. (12)
15 -17. Three rows 12sc. (12)
18. inc, 5sc, inc, 5sc. (14)
19 – 21. Three rows 14sc. (14)
22. inc, 6sc, inc, 6sc. (16)
23 – 30. Eight rows 16sc. (16)
31. inc, 7sc, inc, 7sc. (18)
32. inc, 8sc, inc, 8sc. (20)
33. inc, 9sc, inc, 9sc. (22)
34. inc, 10sc, inc, 10sc. (24)
35. 24sc. (24)
We divide the ear in half, the last 24th column should be in the middle of the ear, if not, then knit the required number of columns.
We continue the first half of the ear –
1. Skipping 11 columns, inc, 10sc, inc. (14)
2. 14sc. (14)
3. (dec)*7. (7) cut the thread, pull off and hide.
We also knit the second half of the ear.
cut the thread, pull off and hide.
We also knit the second half of the ear.- 3ch, 4tr, 3dc, ch, dc, ch, 3dc, 4tr, 3ch, slst. Pull the amigurumi into the ring.
Can be tied behind the back walls with single crochet posts.
Hearts for paws and eyes are small.
in MR recruiting – 2ch, 4dc, 3sc, ch, dc, ch, 3sc, 4dc, 2ch, slst.
Pull the amigurumi into the ring.
Tail.
1. 6sc in MR
2. (inc)*6. (12)
3. (1sc, inc)*6. (18)
4. (2sc, inc)*6. (24)
5. (sc,dec)*3, (inc)*6, (dec,sc)*3. (24)
6. 24sc.
We fill in the process of sewing, (with increments to the bottom, between 4 and 5 rows from the connecting paws.)
We outline the location of the eye and mouth.
We pull each “eye” separately through the hole for the frame.
We pull each corner of the mouth separately through the not tied hole on the top of the head.
Sew on hearts, eyes. We embroider the mouth and eyebrows.
Eyes – basting, between 6 and 7 rows, 12 columns between the peephole.
Mouth – basting, between 9 and 10 rows, 11 columns between basting.
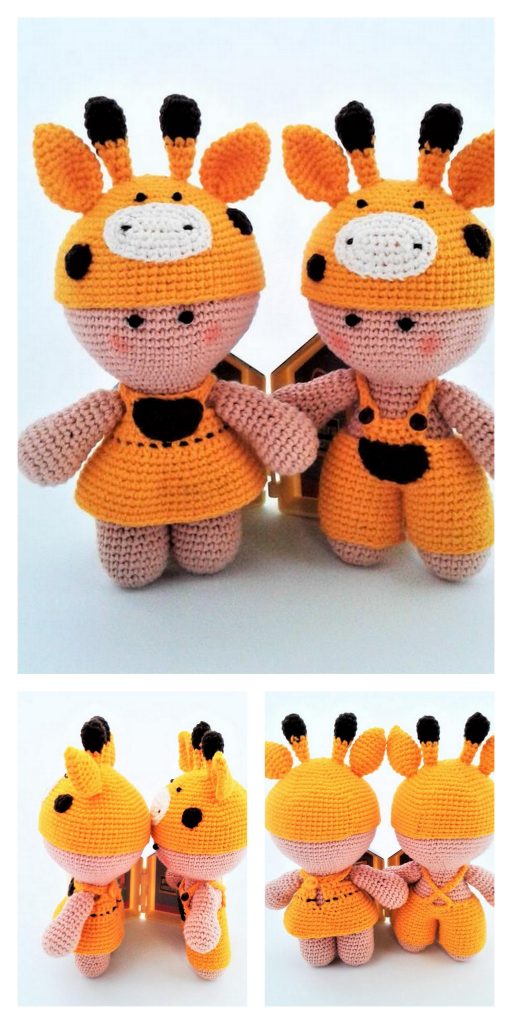
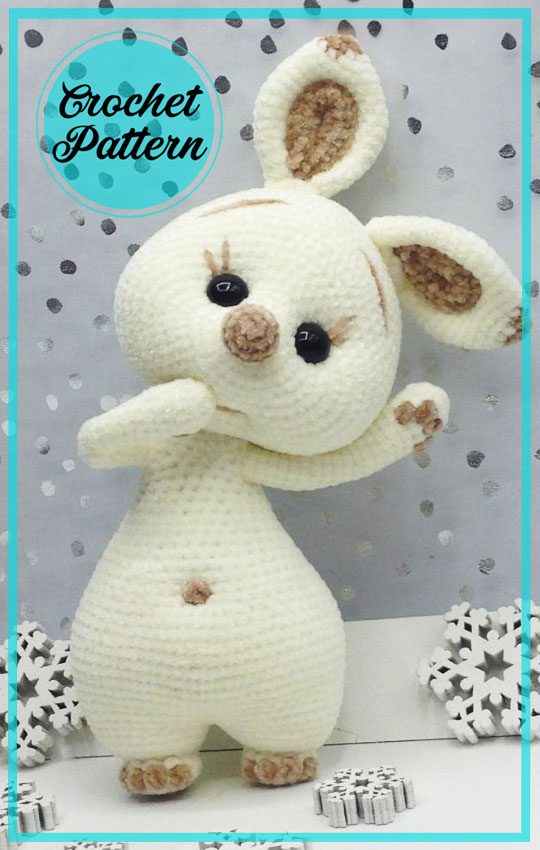
Supplement for knitting a little bunny based on
We knit the hind legs and body up to the 9th row in the same way
10 – 14 five rows 66sc. (66)
15 (9sc,dec)*6. (60)
16 60sc. (60)
17 4sc,dec,(8sc,dec)*5, 4sc. (54)
18 (7sc,dec)*6. (48)
19 3sc, dec, (6sc,dec)*5, 3sc. (42)
20 (5sc,dec)*6. (36)
21 36sc. (36)
22 2sc,dec,(4sc,dec)*5,2sc. (30)
23 30sc. (30)
24 (3sc,dec)*6. (24)
25 – 26 two rows 24sc. (24)
27 knit a hole for the feet, 4sc, 4ch – skip 4 columns, 8sc, 4ch – skip 4 columns, 4sc. (24)
28 4sc, 4sc along ch, 8sc, 4sc along ch, 4sc. (24)
29 sc, dec, (2sc, dec)*5, sc. (18)
30 18sc. (18). We fix the thread, cut it off.
Upper paws.
We knit in a spiral, you can not follow the marker.
1 Along left sts 4sc, sc between rows, 4sc along ch, sc between rows. (10)
2 – 7 six rows 10sc. (10)
8 (decrease in front)(dec)*2, 6sc. (8)
9 (inc)*2, 6sc. (10)
10 10sc. (10)
11 4sc,inc,5sc. (11)
12 inc,10sc. (12)
13 – 17 five rows 12sc. (12)
18 (dec)*6. (6). Cut the thread, pull together and hide.
Ears
We knit in a spiral, you can not follow the marker.
1. 6sc in MR. (6)
2. (inc)*6. (12)
3. 12sc. (12)
4. (sc,inc)*6. (18)
5. 18sc. (18)
6. (2sc,inc)*6. (24)
7. 24sc.
8. (3sc,inc)*6. (30)
9 – 11 three rows 30sc. (30)
12. (3sc,dec)*6. (24)
13 – 14 two rows24sc. (24)
15 (2sc,dec)*6. (18)
16 – 17 two rows 18sc. (18)
18 (sc,dec)*6. (12)
19 – 20 two rows 12sc. (12)
Cut off and fasten the thread.
To decorate the middle of the ear, we collect a chain of 21 loops, from the second from the hook 20sc, turn, in each column (ch, slst) * 20.
Fold in half and sew to the middle of the ear.
Head.
We knit in a spiral, follow the marker, runs along the chin and the middle of the back of the head.
We start with the spout with the same thread of a different color.
1 6sc in MR (6)
2 (inc)*6. (12)
3 – 4 two rows 12sc. (12)
5 (dec)*6 . (6) change the color to the main one.
1 (inc)*6. (12)
2 (sc,inc)*6. (18)
3 3sc,(inc)*3,6sc,(inc)*3,3sc. (24)
4 (3sc,inc)*6. (30)
5 6sc,(inc)*3,12sc,(inc)*3,6sc. (36)
6 (5sc,inc)*6. (42)
7 9sc,(inc)*3,18sc,(inc)*3,9sc. (48)
8 (7sc,inc)*6. (54)
9 12sc,(inc)*3,24sc,(inc)*3,12sc. (60)
10 (9sc,inc)*6. (66)
11 – 13 three rows 66sc. (66)
14 we knit a hole (for the frame) on the neck, (3sc, dec) * 3, 36sc, (dec, 3sc) * 2, dec, sc, 2ch – skip 2 columns. (58)
15 2ch – skip 2 columns, 56sc, 2sc along ch. (58)
16 2sc along ch, 58sc. (60)
17 60sc. (60)
18 in this row we knit in half of the ears. 22sc, 6sc with one half of the ear, 4sc, 6sc with one half of the other ear, 22sc. (60)
19 – 21 three rows 60sc. (60)
22 4sc,dec,(8sc,dec)*5,4sc. (54)
23 54sc. (54)
24 (7sc,dec)*6. (48)
25 3sc,dec,(6sc,dec)*5,3sc. (42)
26 (5sc,dec)*6. (36)
27 2sc,dec,(4sc,dec)*5,2sc.(30)
28 (3sc,dec)*6. (24)
We fill the head, we tie it after tightening and sewing on the eyelet.
29 sc,dec,(2sc,dec)*5,sc. (18)
30 (sc,dec)*6. (12)
31 (dec)*6. (6) cut the thread, pull off and hide.
We do each tightening separately.
We arrange the basting for the tightening.
The mouth from the nose down between 8-9 rows, between the basting 5 columns. Eyes on either side of the nose between 6-8 rows, pull through the neck hole.
1 A needle with a strong thread is inserted into the hole for the neck and brought out into the basting of the eye (farthest from the nose), inserted into the second basting of the eye (closer to the nose) and brought out into the hole for the neck, both threads are well tightened and tied to knots. We tighten the second eye in the same order. Sew the eyes through the not tied hole in the toe of the head.
2 We pull both corners of the mouth over the toe of the head. We insert a needle with a strong thread into the opening of the toe of the head and bring it out into the basting of the mouth, insert the needle into the next column and bring it out into the opening of the toe of the head.
We tighten both strings and tie them into knots. In the same order, we tighten the other corner of the mouth.
We supplement the filler in the head and tie it, embroider the mouth
Congratulations
More Amigurumi Doll Ideas