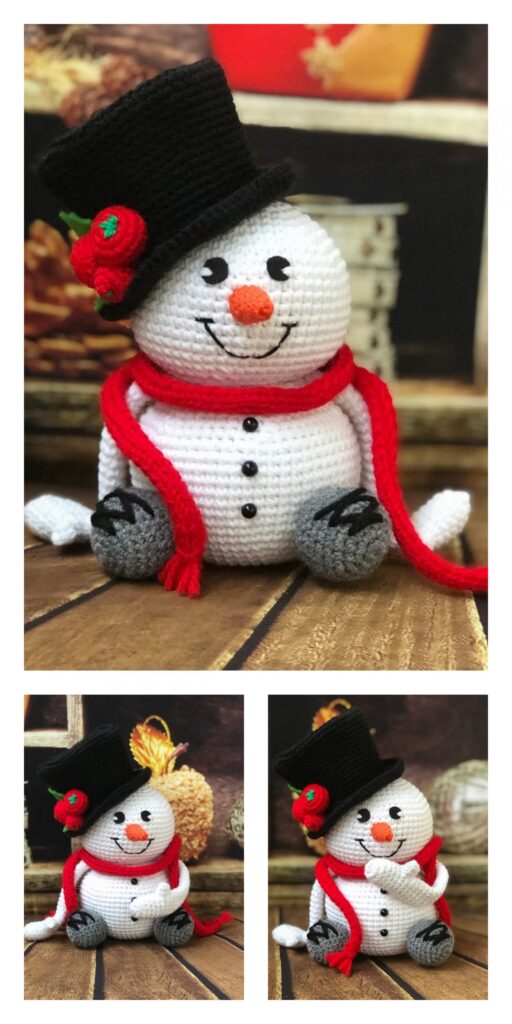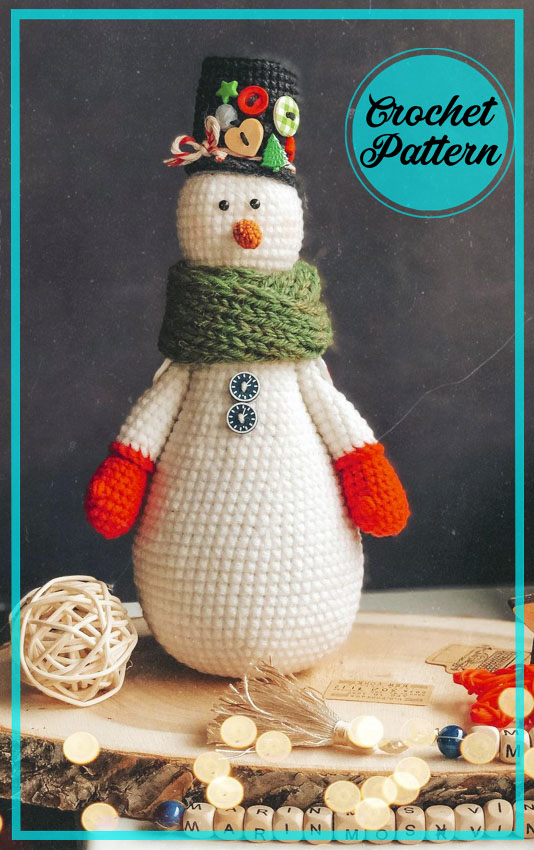
Amigurumi Tall Snowman Free Crochet Pattern
Hello my visitors who love to knit amigurumi. In this article, I share new amigurumi patterns for you free of charge. To knit free amigurumi patterns, it will be enough to follow the terms I shared for you. You can delight your children with amigurumi toys.
Materials and Tools:
White yarn for the body (for example, yarn from Troitsk “Podmoskovnaya” 100g / 250m)
Yarn for mittens (for example, yarn from Troitsk “Podmoskovnaya” 100g / 250m, gray)
Cylinder yarn (e.g. Alize cotton gold, 100g / 330m, black)
Scarf yarn (any woolen)
Nose yarn (carrots), (for example, Alize cotton gold, 100 g / 330 m, orange)
Buttons for sewing hands 15 mm – 2 pieces
Buttons and decorations for the cylinder
Eyes 3 mm
Hook 2.5 mm
Knitting needles for a scarf, 3.5mm
Sintepon for stuffing
Glass granulant
Strong yarn for sewing on hands
Safety pins
Scissors.
Abbreviations:
AR – Amigurumi Magic ring
MR – Amigurumi Magic ring
App – application
ll – lift loop
sc : Single Crochet
inc : Increase
dec : Decrease
tr : Triple Crochet/ Treble Crochet
st: Stitch
dc : Double Crochet
hdc: Half Double Crochet
sl-st : Slip Stitch
ch : Chain
..in : make increase into same stitch as many as the number which is given in front of “inc” abbreviation (exp; 3inc, 4inc..).
FLO : Crochet into front loops only
BLO : Crochet into back loops only
BL : Bobble Stitch – do 5dc all in the same stitch and then yarn over and pull through all the loops on your hook (the original loop + 1 loop for each partially completed dc).
Progress:
We knit in any order: arms, body, nose and top hat. We sew the nose and hands to the body. We decorate the cylinder and sew it to the head.
Telos head:
The body and head are knitted in one piece. I advise you to knit the bottom (with rows 1-11 crochet one size smaller.
This is necessary so that the bottom does not bend.
1 P: 6 in MR
2 P: 6 inc (12)
3 P: 1 sc, inc х 6 (18)
4 P: 2 sc, inc х 6 (24)
5 P: 3 sc, inc х 6 (30)
6 P: 4 sc, inc х 6 (36)
7 P: 5 sc, inc х 6 (42)
8 P: 6 sc, inc х 6 (48)
9 P: 7 sc, inc х 6 (54)
10-16 P: 54 sc (7 rows)
17 P: 7 sc, dec х 6 (48)
18-20 P: 48 sc (3 row)
21 P: 6 sc, dec х 6 (42)
22-24 P: 42 sc (3 row)
25 P: 5 sc, dec х 6 (36)
26-28 P: 36 sc
29 P: 4 sc, dec х 6 (30)
30-32 P: 30 sc
33 P: 3 sc, dec х 6 (24)
34-37 P: 24 sc
38 P: 2 sc, dec х 6 (18)
39 P: 18 sc
40 P: 18 inc (36)
41-47 P: 36 sc
48 P: 4 sc, dec х 6 (30)
49 P: 3 sc, dec х 6 (24)
50 P: 2 sc, dec х 6 (18)
51 P: 1 sc, dec х 6 (12)
52 P: 6 dec (6)
Cut the yarn , pull off the remaining loops.
Hide the yarn !
Hands:
Knit with red yarn :
1 P: 6 in MR
2 P: 6 inc (12)
3 P: 3 sc, inc х 3 (15)
4 P: 15 sc
5 P: 7 sc, one fluffy column, 7 sc (15)
6 P: 15 sc
7 P: 3 sc, dec х 3 (12)
8-9 P: 12 sc
Next, go to knitting with a gray yarn , but do not break off the red one, we will knit an edging for mittens with it.
10-19 P: 12 sc (10 rows)
In this case, we knit the 10th row with a gray yarn , for the back half-loops 12 sc.
In the 19th row, we fill the handle.
20 P: 6 dec (6).
Go back to row 10 and knit 12 sc for the front half loops with red yarn .
Cut the red yarn and hide it inside the handle.
Cut off the gray yarn , collect the remaining loops on a needle, tighten, fix and hide.
Tie the second handle in the same way.
Nose:
P: 5 in MR
2-4 P: 5 sc (3 row)
We stuff the nose tightly.
Cut the yarn , leaving a long tip for sewing.
Cylinder:
P: 6 in MR
2 P: 6 inc (12)
3 P: 12 inc (24)
4 P: 3 sc, inc х 6 (30)
5 P: 30 sc behind the back of the loop.
6-14 P: 30 sc (9 rows)
15 P: 30 sc behind the front wall of the loop
16 P: 30 sc
17 P: 30 slst
The last row, as it were, reinforces the edge of the cylinder fields.
Scarf:
On the needles 3.5 mm, cast on 10 loops and knit with an elastic band: 1 front, 1 purl. At the same time, do not forget to remove the first loop not knitted, but to knit the last one with a purl. These are edge loops.
1 P: hem, * 1 front, 1 purl * (repeat to end of row), purl the last loop.
2 P: hem, then knit the loops according to the pattern, knit the last loop with the purl.
In total, you need to knit 74 rows.
In row 75, close the loops according to the figure.
Sew a scarf, you need to make a snood out of it.
Sew the beginning of the scarf with the end of the scarf.
Assembly:
Sew the nose to the head.
We fix the eyes.
Now we need to sew on the handles. On the edges of the body, select places for the hands and put pins.
We take the buttons and sew on the handles.
We sew buttons to the body of the snowman.
Before that, it is better to put a scarf on the body and mark the attachment points of the buttons.
We decorate the cylinder.
We choose any jewelry. I love buttons in different sizes and colors.
You can add beads, wooden figures, artificial flowers, berries, etc.
We decorate the cylinder, put it on the head and sew it on.
Congratulations
More Amigurumi Snowman Ideas