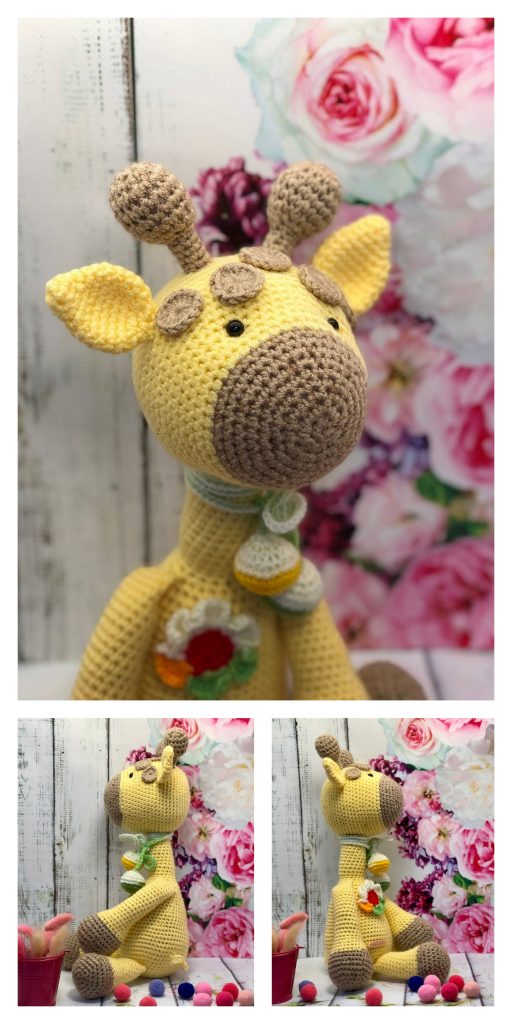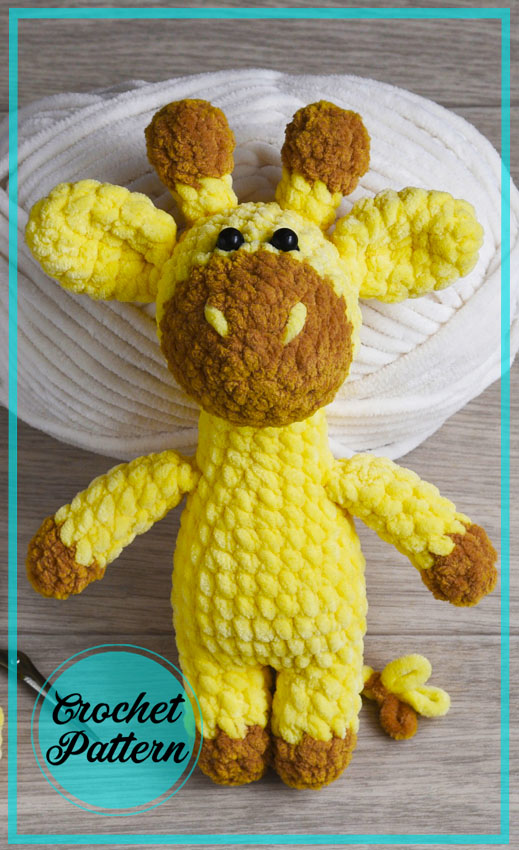
Amigurumi Lovely Big Giraffe Free Crochet Pattern
Hello my visitors who love to knit amigurumi. In this article, I share new amigurumi patterns for you free of charge. To knit free amigurumi patterns, it will be enough to follow the terms I shared for you. You can delight your children with amigurumi toys.
Materials and tools:
Yarn: YarnArt Dolce, hook number 4.5; beads for eyes, strong yarns for sewing them on, needles for sewing on eyes and sewing parts.
Abbreviations:
AR – Amigurumi Magic ring
MR – Amigurumi Magic ring
App – application
ll – lift loop
sc : Single Crochet
inc : Increase
dec : Decrease
tr : Triple Crochet/ Treble Crochet
st: Stitch
dc : Double Crochet
hdc: Half Double Crochet
sl-st : Slip Stitch
ch : Chain
..in : make increase into same stitch as many as the number which is given in front of “inc” abbreviation (exp; 3inc, 4inc..).
FLO : Crochet into front loops only
BLO : Crochet into back loops only
BL : Bobble Stitch – do 5dc all in the same stitch and then yarn over and pull through all the loops on your hook (the original loop + 1 loop for each partially completed dc).
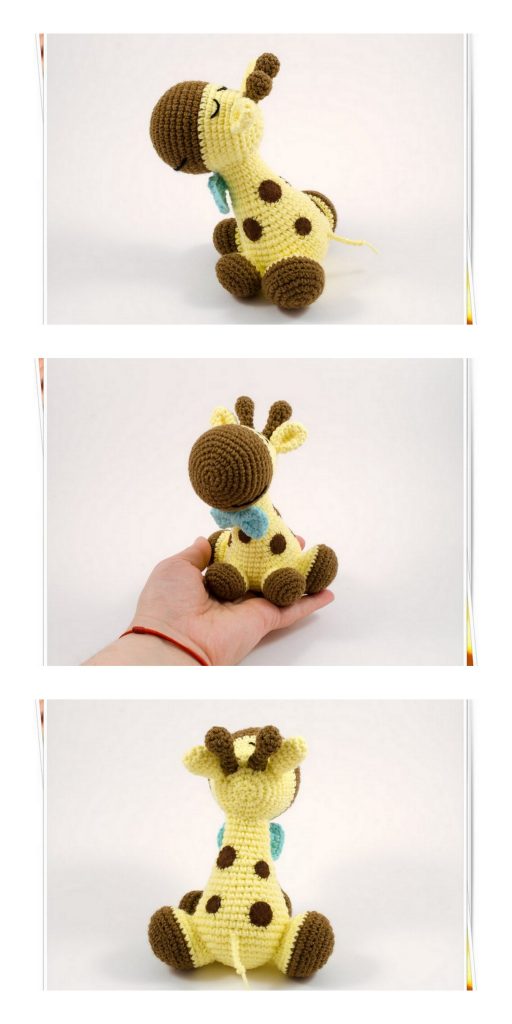
Ears (2 parts):
1.2ch, 6sc into second loop from hook
2. (sc, inc)*3 = 9
3. (2sc, inc)*3 = 12
4-5 – 2 row = 12
6. (sc, dec)*4 = 8
Fold the ear in half, knit 4 sc, yarn fasten and hide.
Horns (2 parts):
In brown:
1.2ch, 6sc into second loop from hook
2. (sc, inc)*3 = 9
3. = 9
4. (sc, dec)*3=6
Yellow:
5-7 – 3 row = 6
We fix the yarn. It is not necessary to fold in half – the horns are sewn in a circle. Fill tightly with filler.
Upper legs (2 parts):
Brown:
1.2ch, 6sc into second loop from hook
2. (sc, inc)*3 = 9
3. = 9
Yellow:
4-9 – 6 rows = 9
10. (sc, dec)*3 = 6, at your discretion – add a little filler to the foot, knit 2 sides together – 3sc, fasten the yarn and hide.
Head:
Brown:
1.2ch, 6sc into second loop from hook
2. inc*6 = 12
3. (sc, inc)*6 = 18
4. = 18
5. (2sc, inc)*6 = 24
6. = 24
7. (7sc, inc)*3 = 27
Yellow:
8-13= 27
14. (7sc, dec)*3 = 24
15. (2sc, dec)*6 = 18
16. (sc, dec)*6 = 12, fill tightly with filler
17.dec * 6 = 6, fasten and hide the yarn.
Body (upper legs are attached during knitting):
We start knitting from the lower left leg.
Brown:
1.2ch, 6sc into second loop from hook
2. (sc, inc)*3 = 9
3. = 9
Yellow:
4-7 – 4 rows = 9
Similarly, we knit the second leg, then – we connect: 8. ch; 9 sc on the left leg; 10th sc at the base of the 1st sc along the left leg; sc on vp; 9sc on the right leg; 10th sc at the base of the 1st sc on the right leg = 22, here I recommend to mark the beginning of the row
9.10 sc, 3inc (center front – above cp and adjacent sc), 9sc, inc = 26
10.sc, inc, 24 sc = 27 – the last pr of the previous row and pr of this row – in the center behind, above the adjacent ones to ch sc
11-15 – 5 rows = 27
16. In this row, we make 3 Decreases, symmetrical to the increments in the 9th row, i.e. center front: 11 sc, 3 dec, 10 sc = 24
Because the center is shifted slightly, possibly shifting Decreases by 1 sc.
17. = 24
18. (2sc, dec)*6 = 18
19. We knit the upper legs: 5 sc; 3 sc, capturing the loops of the upper leg; 6 sc; 3 sc, capturing the loops of the upper leg; sc.
Important: Depending on knitting density, yarn and crochet size, there may be differences in knitting offset. If you do not like the resulting arrangement of the upper legs (it should turn out symmetrically, on the sides of the body) – shift them by 1-2sc.
20. (4sc, dec)*3 = 15
21-25 – 5 rows = 15.
26. we knit several sc so that the last row ends at the side, in my case – 3 sc, fasten and hide the yarn. Legs, body should be tightly filled with filler.
Assembly and design:
Sew the head to the body in a circle.
We outline the location of the horns and ears on the head. Sew the horns in a circle, sew the ears, folding the edge in half. I recommend to sew with a strong yarn, not plush (for example, with Iris yarns – not even in color, they are not noticeable).
Sew on bead eyes, embroider the nose on the muzzle with a plush yarn of yellow color.
Ponytail – a pigtail of 3 double plush yarns (2 yellow, 1 brown – slightly longer than yellow ones, fasten in the back in the center, hide the knots)
Your little plush giraffe is ready!
CONGRATULATIONS!!!
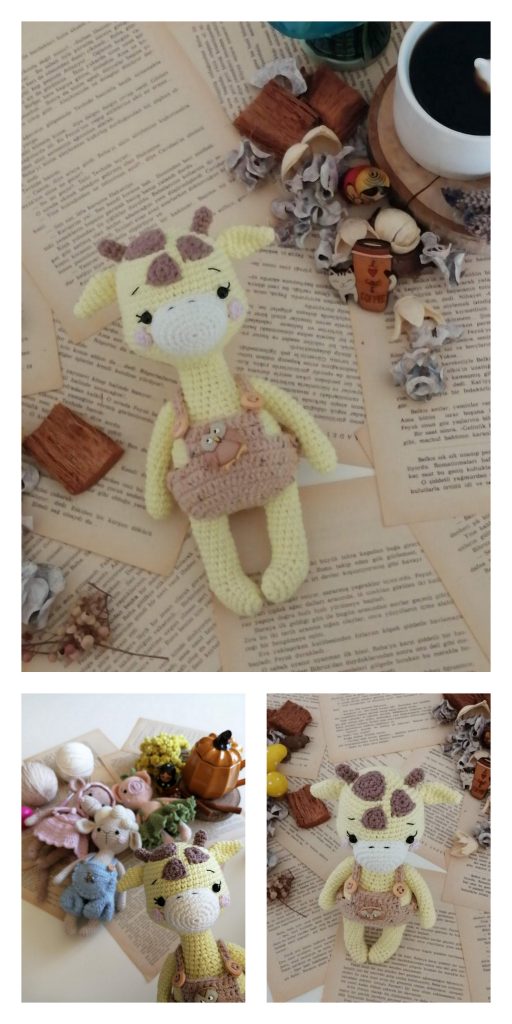
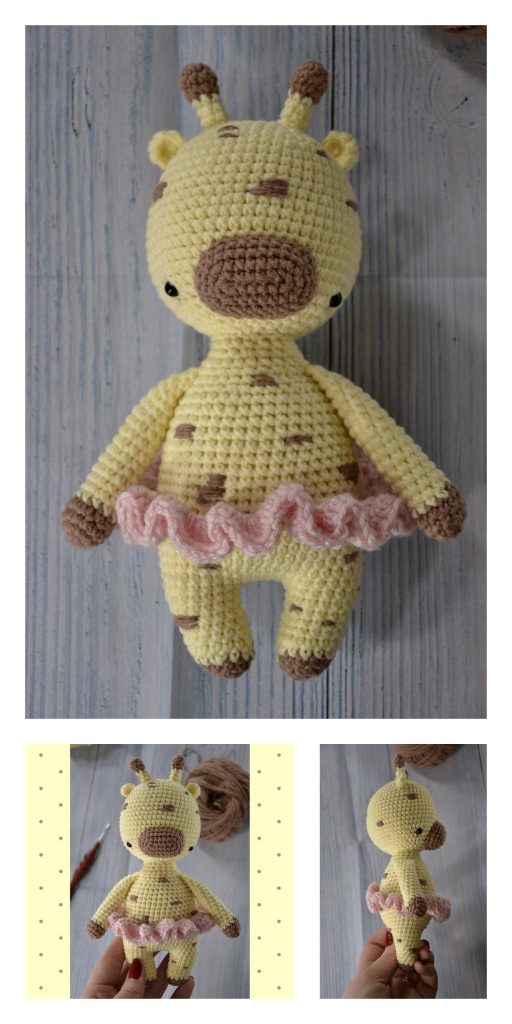
More Amigurumi Giraffe Ideas