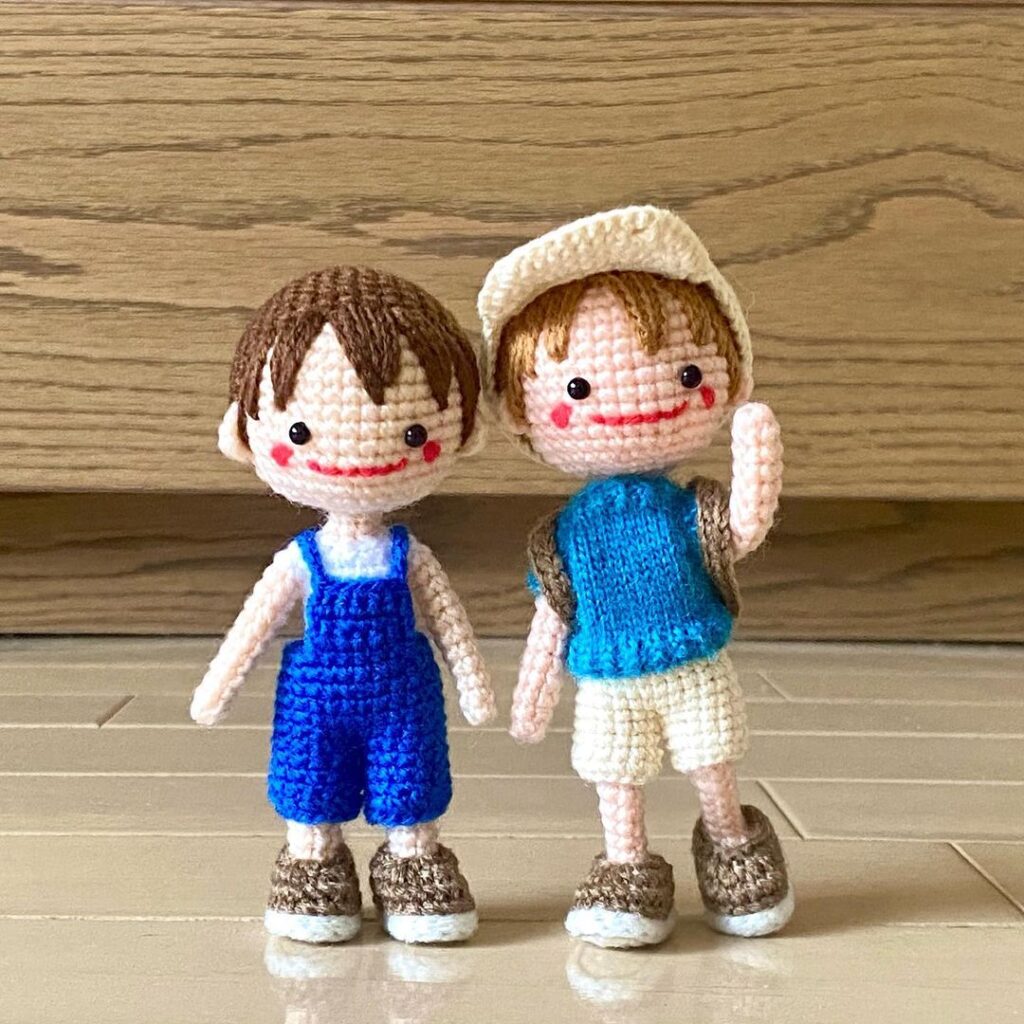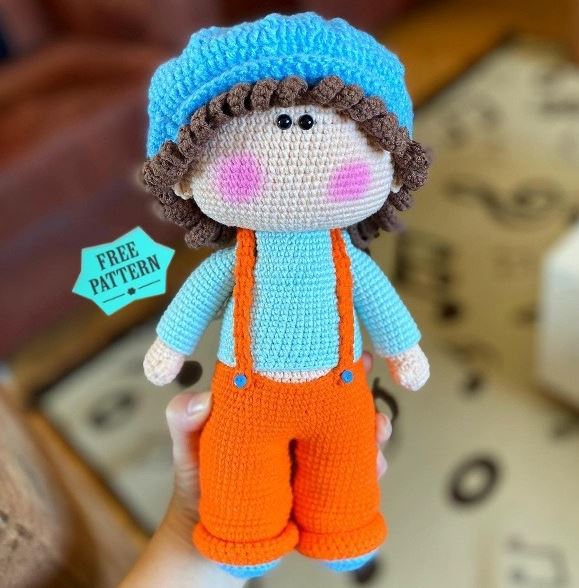
Amigurumi Boy Gilbert Cute Free Pattern
Hello my visitors who love to knit amigurumi. In this article, I share new amigurumi patterns for you free of charge. To knit free amigurumi patterns, it will be enough to follow the terms I shared for you. You can delight your children with amigurumi toys.
Materials
I used YarnArt Jeans for this project.
Body, skin color No:73
Sweater, orange No: 26
Hat, dark green No: 63
Shoes and hair, brown No: 71
Pants, ocher No: 84
I used very little cream for shoe sole and ankle No: 03
Hook 2.20mm
5mm or 6mm safety eyes… Don’t use bigger size eyes I tried 8mm eyes and his
expression was totally different.
Fiber filling
scissors
tapestry needle & long needle for sewing the arms and head
2 little buttons (for the suspenders)
Stitch marker (you may use a piece of yarn in different color)
Abbreviations
MR=Magical Ring
st=loop
sc=single crochet
inc=increase
dec=decrease
(….)*n Repeat written in the parentheses n times.
Blo=back order loop
Flo=front order loop
ss=slip stitch
Hdc=half double crochet
Dc=double crochet
Dcv=increase with double crochet
Dca=decrease with double crochet
HEAD
R1 – 6 sc in Magic Ring (6)
R2 – 6 inc (12)
R3 – (1sc, 1inc)* 6 (18)
R4 – (2sc, 1inc)* 6 (24)
R5 – (2sc, 1inc)* 6 (30)
R6 – (4sc, 1inc)* 6 (36)
R7 – (5sc, 1inc)* 6 (42)
R8 – (6sc, 1inc)* 6 (48)
R9 – (7sc, 1inc)* 6 (54)
R10 – (8sc, 1inc)* 6 (60)
R11 – (9sc, 1inc)* 6 (66)
R12 – (10sc, 1inc)* 6 (72)
R13 – (11sc, 1inc)* 6 (78)
R14 – (12sc, 1inc)* 6 (84)
R15…R31 – 84sc (17rows)
R32 – (12sc, 1dec)* 6 (78)
R33 – (11sc, 1dec)* 6 (72)
R34 – (10sc, 1dec)* 6 (66)
R35 – (9 sc, 1dec)* 6 (60)
R36 – (8 sc, 1dec)* 6 (54)
R37 – (7 sc, 1dec)* 6 (48)
R38 – (6 sc, 1dec)* 6 (42)
R39 – (5 sc, 1dec)* 6 (36)
R40…R53 – 36sc (13 rows)
At the end of row 53 make a slip stitch and cut the thread.
Notes: Attach the safety eyes between rows 19 and 20 leaving 1 stitch between the eyes.
Stamp the eyes by burning from the back since the eyes are too small. After attaching the
eyes, fill the stuffing as you go along. After crocheting the final 13 rows and filling the head,
turn the neck-like part into the head. While filling the head push the filling towards the
cheeks. After filling the head and turning the neck-like part in, press the head from top and
bottom in order to give an oval shape to it.
EARS (make 2)
R1 – 8st in MR (8)
R2 – (1sc, 1inc)*4 (12) Cut the thread leaving long enough for sewing.
HANDS and ARMS (make 2)
R 1 – 8sc in MR (8)
R 2 – (1inc)* 8 (16)
R3 – 16sc (16)
R4 – 16sc
R5 – 2sc, 1 popcorn, 13sc (16)
R6 – 1dec, 8sc, 1dec, 4sc (14)
R7 – 7sc, 2dec, 3sc (12)
R8…R24 – 12sc (17 rows)
R25 – 6dec (6)
Stuff with filling and close the end by sewing.
ARM of the Sweater (make 2)
R1 – 6sc in MR (6)
R2 – 6inc (12)
R3 – (1sc, 1inc)* 6 (18)
R4…R23 – 18sc (20 rows) finish by making slip stitch…
SWEATER
R1 – Crochet 36st, connect both ends with slip stitch.
R2 – 1st, 36sc, 1ss (36)
R3 – 1st, (5sc, 1inc)6, 1ss (42)
R4…R6 – 1st, 42sc, 1ss (42)
R7 – 1st, (6sc, 1inc)6, 1ss (48)
R8…R23 – 1st, 48sc, 1ss (16 rows)
finish
PANTS
R1 – Chain 35 stitches, tie two ends with a slip stitch.
R2 – Chain 1 and make 1 sc in the first stitch (where you tied with ss) and sc along. (35)
R3…R24 – 35sc (22 rows)
Repeat Rounds 1 through R24 making the second
leg
Starting from this round on we will crochet spiral
rows.
R25 – 70sc (70)
R26 – 70sc (70)
R27 – 8sc,1inc,52sc 1inc,8sc (72)
R28 – 72sc (72)
R29 – (10sc, 1dec)* 6 (66)
R30 – (9sc, 1dec)* 6 (60)
R31 – (8 sc, 1dec)* 6 (54)
R32 – 54sc
R33 – 54sc
R34 – 16sc, 1dec, 24sc, 1dec, 10sc (52)
R35 – 52ss, finish. Curl the trotters out…
SUSPENDERS (make 2)
R1 – Chain 3 stitches, make two sc to the first and second chain, turn
R2… R40 – 1ch,2sc, turn
You can adjust the length according to your desire.
RIGHT LEG
With cream color;
R1 – Chain 6
R2 – 3sc in the second chain, 3sc, 6sc in the last chain, 3sc (15)
R3 – put the stitch marker. 3inc, 3sc, 6inc, 3sc (24)
R4 – (1sc, 1inc)3, 3sc,(1sc, 1inc)6,3sc (33)
R5 – 33sc
R6 – 33sc as blo
R7 – 33sc
R8 – 33sc
R9 – 14sc, 8dec, 3sc (25)
R10 – 4sc, 1dec, 19sc (24)
R11 – 24sc
R12 – 24sc
With skin color
R13 – 24sc as blo
R14…R22 – 24sc (10 rows)
R23 – 14sc and finish with a slip stitch.
Note; At the rows we crocheted as blo, we will crochet with any color we wish as flo hdc…
LEFT LEG & BODY
Crochet same as the right leg till R23 (first 22 rows).
R23 – 24sc, chain4, continue with the right leg (stitch exactly in the last ss column of the
right leg), 24sc, 4sc (on the 4 chains), 24sc, continue row making 4 sc (on the 4 chains),
10sc and put the stitch marker.
Important Notice: After continuing crocheting about 3-4 rows, the legs will be as if
they look inside. We have done it on purpose, it’s not a fault.
R24… R30 – 56sc (7 rows)
Note: Count the stitches after crocheting row 24. If the number is more or less, adjust the
count to be exactly 56 stitches while crocheting R25 by making increases or decreases if
required…
R31 – 3sc, 1dec, 26sc, 1dec, 23sc (54)
R32 – (7sc, 1dec)* 6 (48)
R33…R42 – 48sc (10 rows)
R43 – (6sc, 1dec)* 6 (42)
R44 – (5sc, 1dec)* 6 (36)
R45 – (4sc, 1dec)* 6 (30)
R46…R60 – 30sc (15 rows)
R61 – (3sc, 1dec)* 6 (24)
R62 – (2sc, 1dec)* 6 (18)
R63 – (1sc, 1dec)* 6 (12)
R64 – 6dec, finished.
HAT
R1 – 3ch, 11dc,1ss in MR (12dc)
R2 – 3ch, 1dc in the same stitch,11dcv, 1ss (24dc)
R3 – 3ch, 1dc in the same stitch, (as you see in the picture below; make 1dc by taking the
chain around the dc we have crocheted in previous row, 1dcv) * repeat this step till the end
of the row, 1ss.
Note= The 3 cans we are crocheting at the beginning of each row is our first dc. We crochet
our second dc in the same stitch and we go through. The special dc we crochet by taking the
chain around the dc we crocheted in previous row will the 12 in total at the end of each
row. I will mention this special dc as column in the rest of the description.
R4 – 3ch, 2dc, 1 column, (3dc, 1column) *11, 1cc (48dc)
R5 – 3ch, 3dc, 1 column, (4dc, 1column) *11, 1cc (60dc)
R6 – 3ch, 4dc, 1 column, (5dc, 1column) *11, 1cc (72dc)
R7 – 3ch, 5dc, 1 column, (6dc, 1column) *11, 1cc (84dc)
R8 – 3ch, 6dc, 1 column, (7dc, 1column) *11, 1cc (96dc)
R9 – 3ch, 7c, 1 column, (8dc, 1column) *11, 1cc (108dc)
R10 – 3ch, 8dc, 1 column, (9dc, 1column) *11, 1cc (120dc)
R11 – 3ch, 3dc,1dca,3dc,1column, (4dc, 1dca, 3dc, 1column) *11,1cc (108dc)
R12 – 3ch, 2dc,1dca,3dc,1column, (3dc, 1dca, 3dc, 1column) *11,1cc (96dc)
R13 – 3ch, 1dc,1dca,3dc,1column, (2dc, 1dca, 3dc, 1column) *11,1cc (84dc)
R14 – 3ch, 1dc,1dca,2dc,1column, (2dc, 1dca, 2dc, 1column) *11,1cc (72dc)
R15 – 72sc
R16 – 72sc as flo
R17 – 1ch,25sc, turn
R18 – 1ch, from the second stitch 23sc, turn
R19 – 1ch, 1hdc into the second stitch, 20 dc, 1hdc, 4cc finished.
HAIR
We will crochet our hair to the blo of the rows we crocheted as flo. We will start to crochet
from the middle stitch of the back of our hat.
(10 ch, turn, on the stitches; 8 hdc , 2cc) 12 (repeat parentheses 12 times)
(10ch, turn, on the stitches; 9sc, 2cc)13
(10ch, turn, on the stitches; 8 hdc , 2cc) *10
The hair is finished…
ASSEMBLING PARTS
Put on the clothes to the arms, body and the trousers to the legs. Adjust the length of the
suspenders and sew them to the trousers straight from the front and crossed from the back
Sew the arms to the sides of the body to the marked places shown in the picture. Make sure
that it you sew tight, then it does not become loose after some time.
ASSEMBLING THE EARS
You can mark as shown in the picture above for your ease. The ears will be 9 rows
below the eyes and 16 stitches to the left and right respectively.
ASSEMBLING THE BODY TO THE HEAD
Thread the needle with 3 strands of skin color and sew as you see in the first picture. As
you see in the second picture take each end of the thread out from the head 5 rows away
from the center of the MR. Put the doll’s neck tight into the head. And fix your threads
tightly
ASSEMBLING THE HAT
We will start sewing our hat 6 rows above the eyes. The start positons of each piece are
shown in the pictures 1 and 2 above. Lower the hat to the neck. Let his hair touch his
shoulders. Sew the hat on the head at intervals that we can sink easily with our needle …
Make sure that the hair is left out while sewing…
Congratulations
More Amigurumi Doll İdeas