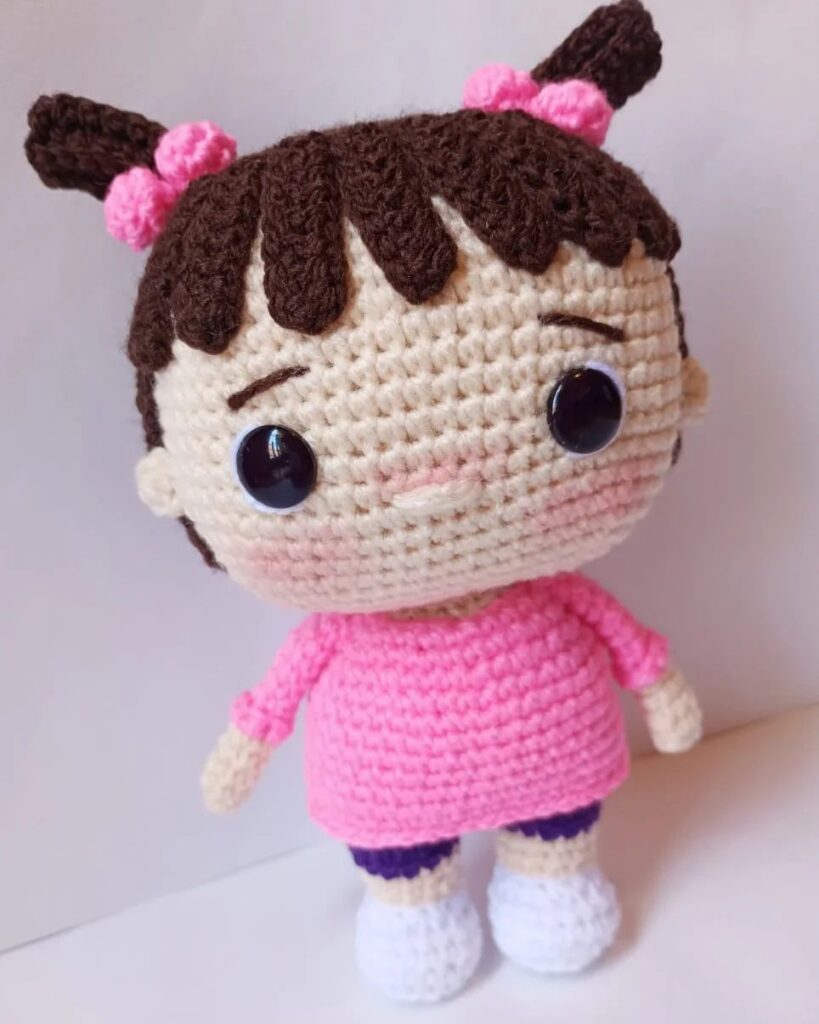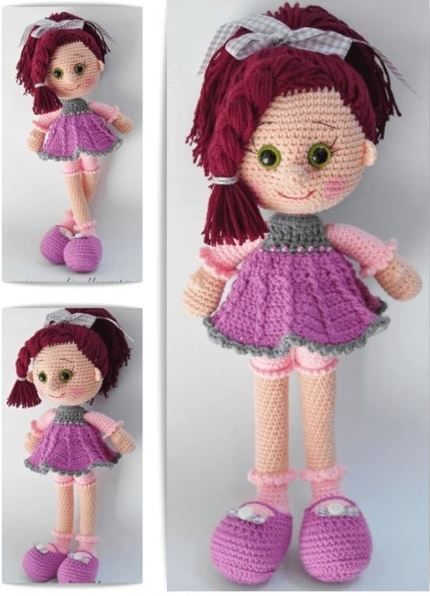
Amigurumi Free Cute Candy Doll Pattern
Hello my visitors who love to knit amigurumi. In this article, I share new amigurumi patterns for you free of charge. To knit free amigurumi patterns, it will be enough to follow the terms I shared for you. You can delight your children with amigurumi toys.
Terminology
St = Stitch
Ch = Chain
Sl St = Slip Stitch
Sc = Single crochet
BLO = Back Loop Only
FLO = Front Loop Only
Hdc = Half double crochet
Dc = Double crochet
Tr = Triple crochet
Inc = Increase
Dec = Decrease
Popcorn = Crochet 4 Dc in 1 stitch, but wait with last pulling through on each st until there are 5 loops on hook. Now pull through all 5 loops ( the 4 dc are crochet tog to 1 dc )
Head:
Using Scin color.
Round 1: Sc 6 in Magic Ring ( 6 Sts )
Round 2: Inc * 6 ( 12 Sts )
Round 3: ( Sc 1 , Inc ) * 6 ( 18 Sts )
Round 4: ( Sc 2 , Inc ) * 6 ( 24 Sts )
Round 5: ( Sc 3 , Inc ) * 6 ( 30 Sts )
Round 6: ( Sc 4 , Inc ) * 6 ( 36 Sts )
Round 7: ( Sc 5 , Inc ) * 6 ( 42 Sts )
Round 8: ( Sc 6 , Inc ) * 6 ( 48 Sts )
Round 9: ( Sc 7 , Inc ) * 6 ( 54 Sts )
Round 10: ( Sc 8 , Inc ) * 6 ( 60 Sts )
Round 11 – 23: SC 60 ( 60 Sts )
Round 24: ( Sc 8 , Dec ) * 6 ( 54 Sts )
Round 25: ( Sc 7 , Dec ) * 6 ( 48 Sts )
Round 26: ( Sc 6 , Dec ) * 6 ( 42 Sts )
Round 27: ( Sc 5 , Dec ) * 6 ( 36 Sts )
Round 28: ( Sc 4 , Dec ) * 6 ( 30 Sts )
Round 29: ( Sc 3 , Dec ) * 6 ( 24 Sts )
Round 30: ( Sc 2 , Dec ) * 6 ( 18 Sts )
Round 31: ( Sc 1 , Dec ) * 6 ( 12 Sts )
Round 32: Dec * 6 ( 6 Sts )
Note:
Insert Eyes between Rounds 16 & 17. Eyes should be about 5 Sts apart.
Body:
Using any color you want for shirt.
Round 1: Sc 6 in Magic Ring ( 6 Sts )
Round 2: Inc * 6 ( 12 Sts )
Round 3: ( Sc 1 , Inc ) * 6 ( 18 Sts )
Round 4 – 5: Sc 18 ( 18 Sts )
Round 6: ( Sc 2 , Inc ) * 6 ( 24 Sts )
Round 7: Sc 24 ( 24 Sts )
Round 8: ( Sc 3 , Inc ) * 6 ( 30 Sts )
Round 9: Sc 30 ( 30 Sts )
Round 10: ( Sc 4 , Inc ) * 6 ( 36 Sts )
Round 11: Sc 36 ( 36 Sts )
Round 12: ( Sc 5 , Inc ) * 6 ( 42 Sts )
Round 13 – 14: Sc 42 ( 42 Sts )
Round 15: ( Sc 6 , Inc ) * 6 ( 48 Sts )
Round 16 : Sc 48 ( 48 Sts )
Round 17: ( Sc 7 , Inc ) * 6 ( 54 Sts )
Round 18: Sc 54 ( 54 Sts )
Switch to any color you want for pants.
Round 19: Sc 54 ( 54 Sts )
Round 20: ( Sc 8 , Inc ) * 6 ( 60 Sts )
Round 21: Sc 60 ( 60 Sts )
Round 22: ( Sc 4 , Dec ) * 10 ( 50 Sts )
Round 23: ( Sc 3 , Dec ) * 10 ( 40 Sts )
Round 24: ( Sc 2 , Dec ) * 10 ( 30 Sts )
Round 25: ( Sc 4 , Dec ) * 5 ( 24 Sts )
Round 26: ( Sc 3 , Dec ) * 5 ( 20 Sts )
Sound 27: ( Sc 2 , Dec ) * 5 ( 16 Sts )
Round 28: Dec * 8 ( 8 Sts )
Hands and Arms:
Using scin color
Round 1: Sc 6 in Magic Ring ( 6 Sts )
Round 2: Inc * 6 ( 12 Sts )
Round 3: ( Sc 1 , Inc ) * 6 ( 18 Sts )
Round 4 – 5: Sc 18 ( 18 Sts )
Round 6: ( Sc 7 , Dec ) * 2 ( 16 Sts )
Round 7: Sc 16 ( 16 Sts )
Round 8: Sc 6 , Popcorn , Sc 9
Round 9: ( Sc 6 , Dec ) * 2 ( 14 Sts )
Round 10: Sc 14
Round 11: ( Sc 5 , Dec ) * 2 ( 12 Sts )
Switch to color you used for shirt.
Round 12: Sc 12 ( 12 Sts )
Round 13: Sc 12 BLO ( 12 Sts )
Round 14 – 21: Sc 12
Fasten off leaving long tail for sewing.
In the Front Loops of Round 8:
Using yarn color you used for shirt
( Sl St in any St , Ch 3 , Sl St in next St ) Repeat till end of the Round , Fasten off
Note:
Don’t overstuff the upper arms, otherwise the arms will remain open sideways.
Feet:
Using color you want for socks.
Round 1: Sc 6 in Magic Ring ( 6 Sts )
Round 2: Inc * 6 ( 12 Sts )
Round 3: ( Sc 1 , Inc ) * 6 ( 18 Sts )
Round 4: ( Sc 2 , Inc ) * 6 ( 24 Sts )
Round 5: ( Sc 3 , Inc ) * 6 ( 30 Sts )
Round 6 – 11: Sc 30 ( 30 Sts )
Round 12: ( Sc 13 , Dec ) * 2 ( 28 Sts )
Round 13: Sc 28 ( 28 Sts )
Round 14: ( Sc 12 , Dec ) * 2 ( 26 Sts )
Round 15: Sc 26 ( 26 Sts )
Round 16: ( Sc 11 , Dec ) * 2 ( 24 Sts )
Round 17: Sc 24 ( 24 Sts )
Round 18: ( Sc 10 , Dec ) * 2 ( 22 Sts )
Round 19: Sc 22 ( 22 Sts )
Round 20: ( Sc 9 , Dec ) * 2 ( 20 Sts )
Stuff legs
Round 21: Sc 3 Sts togeter * 6 , Dec
Sew shut using the tail.
Legs:
Using white yarn
Sc 15 out of the feet we made before.
Round 1 – 6: Sc 15
Switch to scin colored yarn
Round 7: Sc 15 BLO
Round 8 – 19: Sc 15
Switch to color you used for pants
Round 20: Sc 15
Round 21: BLO (Sc 4 , Inc ) * 3 ( 18 Sts )
Round 22 – 25: Sc 18
Fasten off leaving long tail for sewing.
In the Front Loops of Rounds 7 & 21:
( Sl St in any St , Ch 3 , Sl St in next St ) Repeat till end of round , Fasten off
Note: If you want the legs to be longer just make more rounds with scin color.
Shoes:
Round 1: Ch 8 , in 2. chain from Sc 6 , Sc 3 in next St , Sc 6 , Sc 3 in next St ( 18 Sts )
Round 2: Sc 6, Inc 3 , Sc 6 , Inc 3 ( 24 Sts )
Round 3: Sc 3 , Hdc , Dc 2 , Dc Inc 6 , Dc 2 , Hdc , Sc3 , ( Inc , Sc1 ) * 3 ( 33 Sts )
Round 4: Sc 3 , Hdc 2 , Dc 5 , Dc Inc 6 , Dc5 , Hdc 2 , Sc2 , ( Sc1 , Inc ) * 4 ( 43 Sts )
Round 5: Sc 43 BLO ( 43 Sts )
Round 6 – 9: Sc 43 ( 43 Sts )
Round 10: Sc 8 , Hdc 2 , Hdc Dec 8 , Hdc 2 , Sc 15 ( 35 Sts )
Round 11: Sc 8 , Hdc 12 , Sc 15 ( 35 Sts )
Round 12: Sc 8 , Hdc 2 , Hdc Dec 4 , Hdc 2 , Sc 9 , Dec 3 ( 28 Sts )
For shoelaces take shoes on feet and make a Sl St on the place you want shoelaces to be.
Ch 8 and make a Sl St on opposite side.
Turn.
Hdc 8 Fasten of and hide yarn.
Nose:
Using scin color
Round 1: Sc 6 in Magic Ring
Round 2: Sc6
Fasten off and leave tail for sewing
Ears:
Dc 9 in Magic Ring
Sew on at eye level
Dress:
Top part
Ch 26 ,
Row 1: Ch 1 , turn , Sc 25 , turn
Row 2: Ch 6 , turn , Tr 5 , Ch 2 , Tr 10 , Ch 2 , Tr 6
Row 3: Ch 1 , turn , Sc 25
Bottom part
continue top part
Row 4: Change to color of your choice , Ch 3 , turn , ( Dc , Sc 1 ) till end of Row
Row 5: Ch 3 , turn , ( Dc 2 , Back Post Dc) till end of Row
Row 6: Ch 3 , turn , [ Dc 1 , ( Dc 1 , Front Post Dc ) in one St ] till end of Row
Row 7: Ch 3 , ( do not turn) [ Dc 2 , ( Dc1 , Front Post Dc) in one St] till end of Row , make a Sl St in 1. Dc
Row 8: Ch 3 , [ Dc 3 , ( Dc 1 , Front Post Dc ) in one St ] till end of Row , Sl St
Explanation:
Attach Eyes, sew ears and nose to head before sewing together head and body.
To watch how to sew arms to body look HERE.
You can sew legs to body, like the arms or if you want to be them straight, you can sew them on like head.
If you want a buttonhole for your dress, add in the top part 8 chains to the 26 chains and continue crocheting in 9. Stitch from hook.
If you also want a buttonhole for shoes add enough chains to shoelaces so your button get through, then make a Sl St to opposite side of shoe and continue shoelaces.
If you want to make a neck for your doll like I’ve made, make some Rounds with 12 Sc after Round 31. To make the neck part straight put the end of a cable through head and body and sew together.
Congratulations
More Amigurumi Doll İdeas
